Realistic Pencil Portrait — 7 Tips I Wish I Knew Earlier
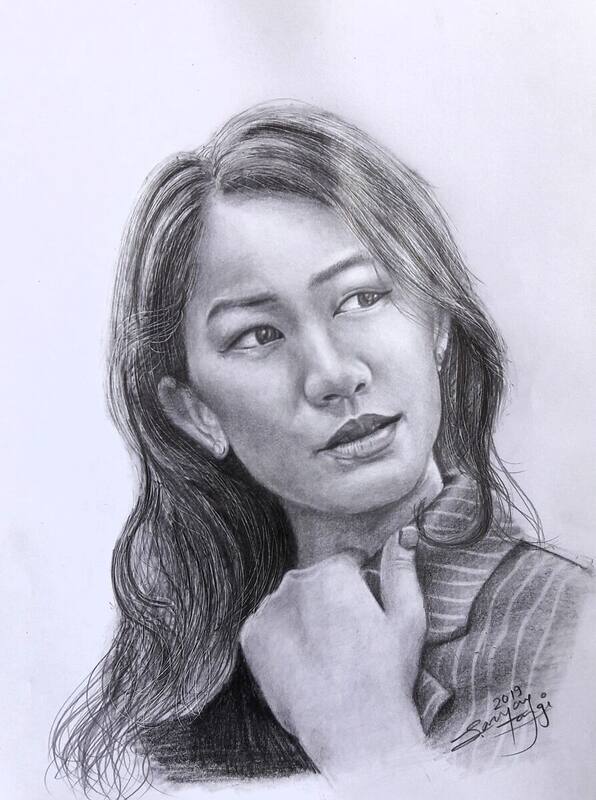
I've been drawing pencil portraits since I was a teenager, and some lessons took years to learn the hard way. Whether you're just starting out or looking to improve your portrait skills, these 7 tips will save you a lot of frustration.
1. Start with Accurate Proportions — Not Details
The number one mistake I see is jumping into eye details before the overall proportions are right. No amount of beautiful shading will save a portrait where the eyes are too far apart or the nose is too long.
What to do: Spend the first 15-20 minutes on a light construction drawing. Map out the placement of eyes, nose, mouth, and the overall head shape. Use the "eye-width" measurement — the face is roughly 5 eye-widths across. Only move to details once you're confident the proportions are correct.
2. Invest in Good Pencils
You don't need dozens of pencils, but having a range matters. My essential set:
- HB — initial sketch and light areas
- 2B — general shading and mid-tones
- 4B — darker shadows and depth
- 6B or 8B — the darkest darks (pupils, deep shadows)
Brands like Staedtler, Faber-Castell, or Derwent are all excellent. The key is consistency — stick with one brand so you learn how each grade behaves.
3. Shade in Layers, Not All at Once
Building tone gradually gives you much more control. I typically work in 3-4 passes:
- First pass — light overall shading to establish the basic value map
- Second pass — deepen shadows and define the mid-tones
- Third pass — push the darks, refine transitions
- Final pass — details, highlights (with an eraser), and cleanup
Each layer should be relatively light. It's much easier to darken than to lighten.
4. Learn to See Values, Not Lines
Real faces don't have outlines. What we perceive as edges are actually transitions between light and dark values. Train yourself to squint at your reference photo — this simplifies the tones and helps you see the big shapes of light and shadow.
A common exercise: try drawing a portrait using only shading, no outlines at all. It's challenging but transformative for understanding form.
5. Hair Is Not Individual Strands
Drawing every single hair is tedious and usually looks worse than treating hair as masses of value. Here's my approach:
- Block in the overall shape of the hair as a dark mass
- Add lighter areas where the hair catches light
- Only draw individual strands at the edges and highlights — this creates the illusion of detail everywhere
- Use the side of your pencil for broad strokes and the tip only for accent strands
6. Use a Blending Stump — But Sparingly
Blending stumps (tortillons) are great for smooth skin tones, but over-blending makes everything look soft and lifeless. My rule:
- Blend smooth areas — forehead, cheeks, neck
- Don't blend textured areas — hair, eyebrows, fabric, wrinkles
- After blending, go back in with a sharp pencil to re-define edges — this keeps the drawing crisp
7. Your Eraser Is a Drawing Tool
A kneaded eraser and a precision eraser (like Tombow Mono Zero) are just as important as your pencils. Use them to:
- Lift highlights — the brightest spots on the nose, forehead, and lips
- Create hair strands — erase thin lines through dark areas for realistic highlights
- Soften edges — dab with a kneaded eraser to gently reduce tone
- Fix mistakes — obviously, but also as a creative tool, not just a correction tool
Bonus: Practice from Photos, Not Other Drawings
Drawing from other people's artwork teaches you their interpretation, not reality. Always work from photographs (or better yet, from life). This trains your eye to see real values, textures, and proportions rather than someone else's stylistic choices.
Related reading: See my 2026 pricing guide for custom artwork in Canada, or learn about commissioning a custom mural if you're thinking bigger.
Want a Custom Pencil Portrait?
I create detailed pencil portraits from your photos — perfect as gifts or personal keepsakes.
Commission a Portrait